Initial Setup
Setting up your GoodWeb Account and Website

Yel Legaspi
Last Update há 3 anos
Note: The instructions on this page assumes you have signed up and logged in the system. The following steps are triggered when it's your first time logging in to the application.
Going through the Setup Wizard
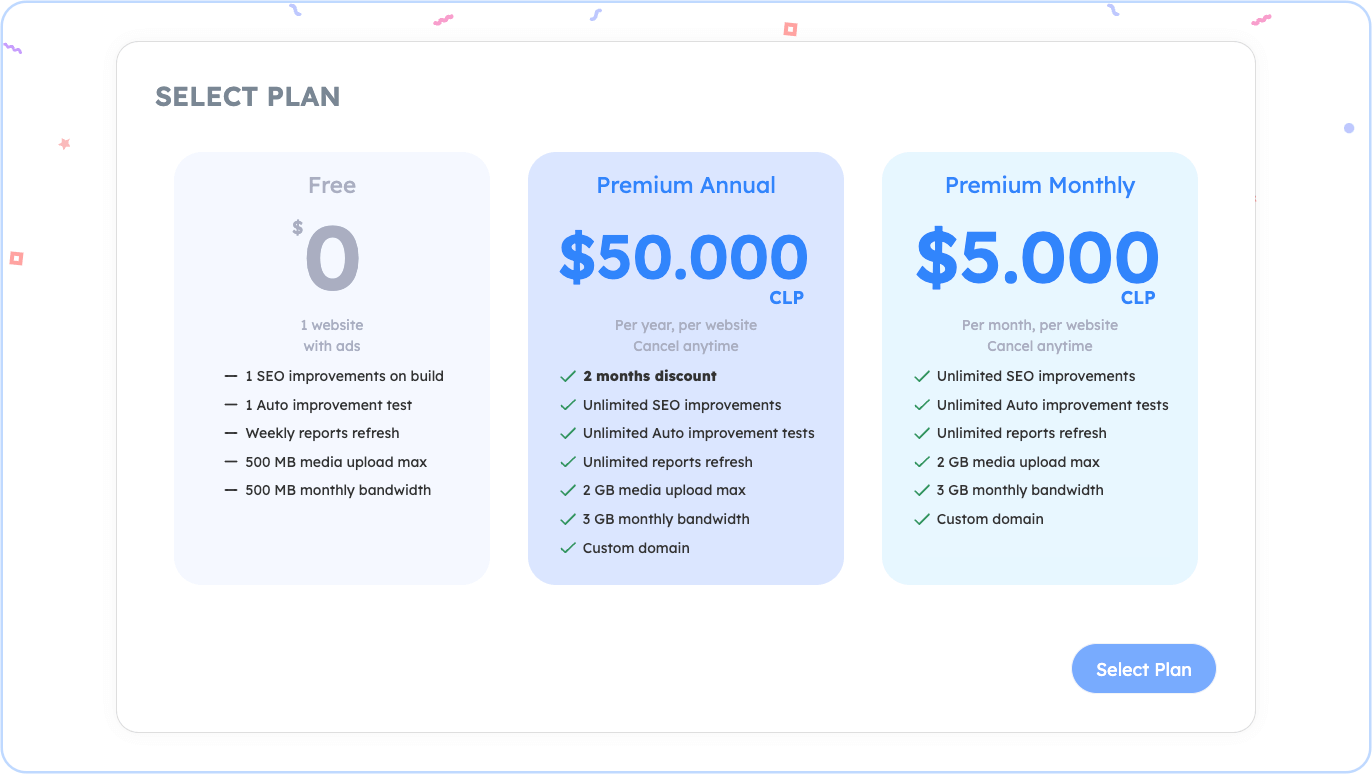
Select Plan: After signing up and logging in, the application will prompt you to choose your plan. If you choose any of our premium plans you will be prompted to continue with your payment details.
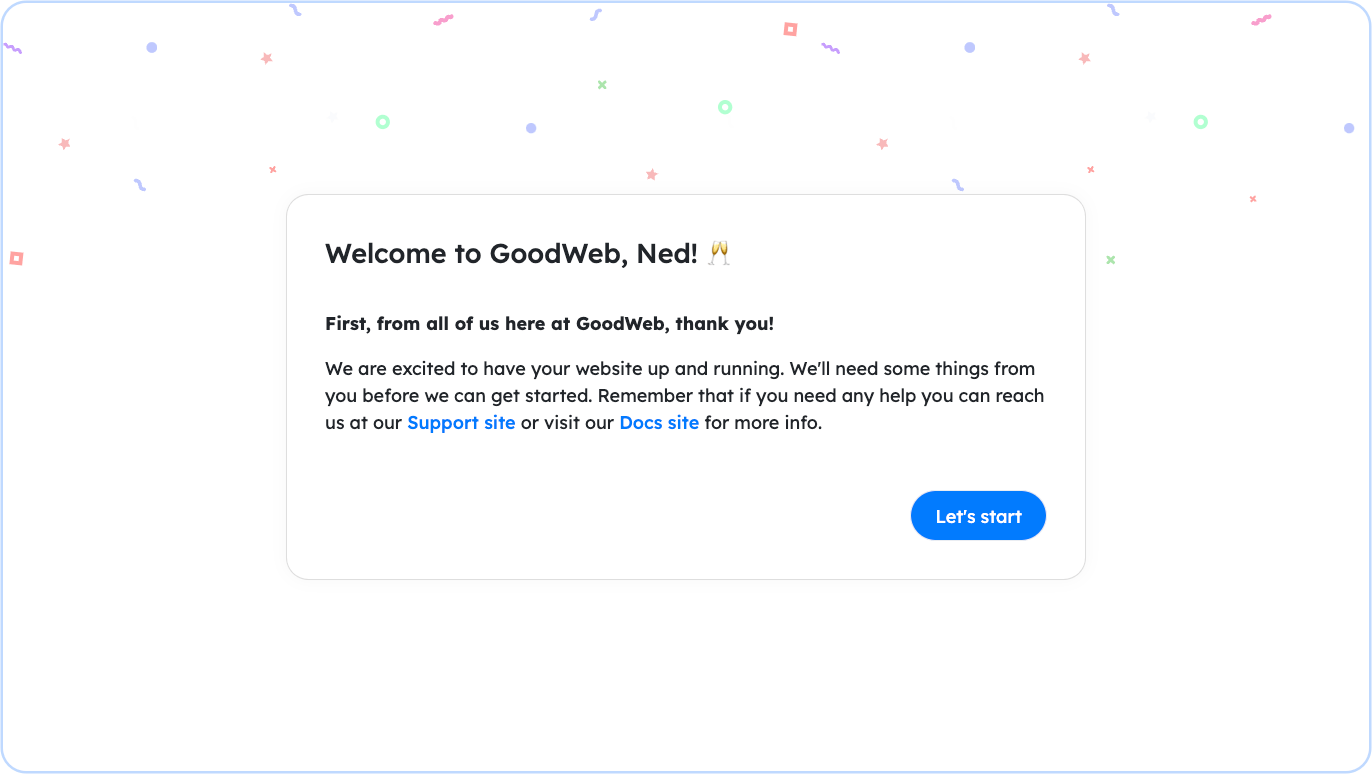
Next, you will be prompted with a welcome message. Click Let's Start.
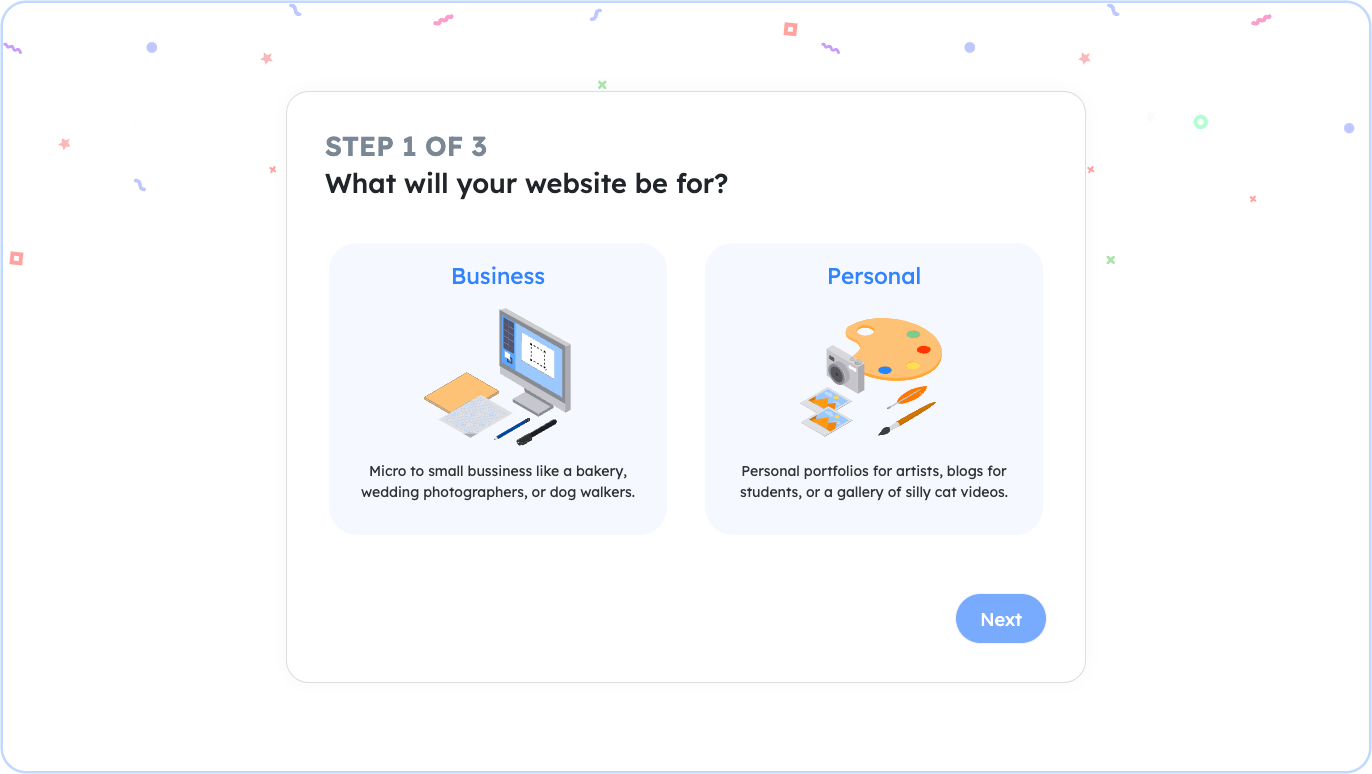
Choose what will your website be used for: either for business or personal. Click Next to continue after choosing.
Add the name of your website e.g. "Ned's Tasty Caterings". Click Next when ready. You can change this later on the Settings page.
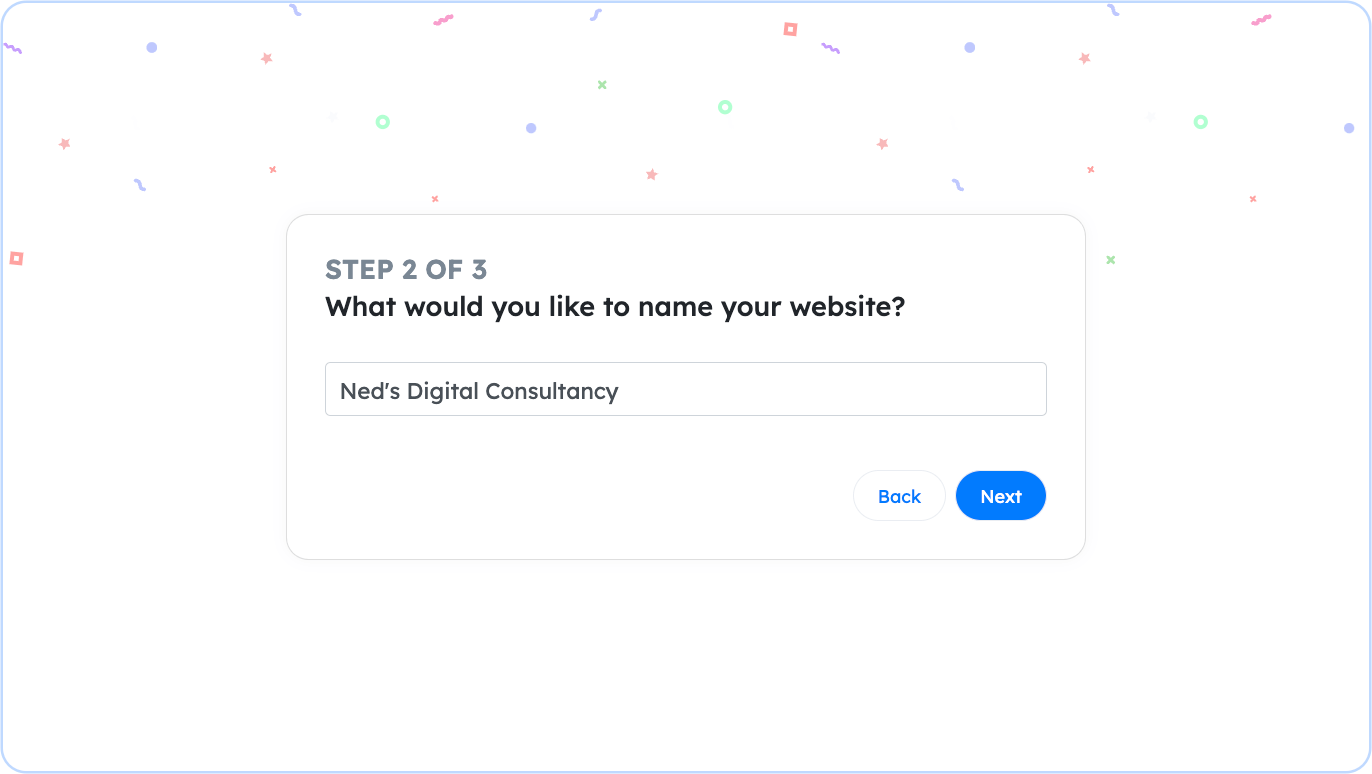
Note: By default, the name of your website is going to be used as your domain name. For example "Ned's Tasty Caterings" will be used and will become "nedstastycaterings.goodweb.app" as your domain name. You don't need to change your website name if you don't like your domain name. You can change your domain name later on the Website Settings page.
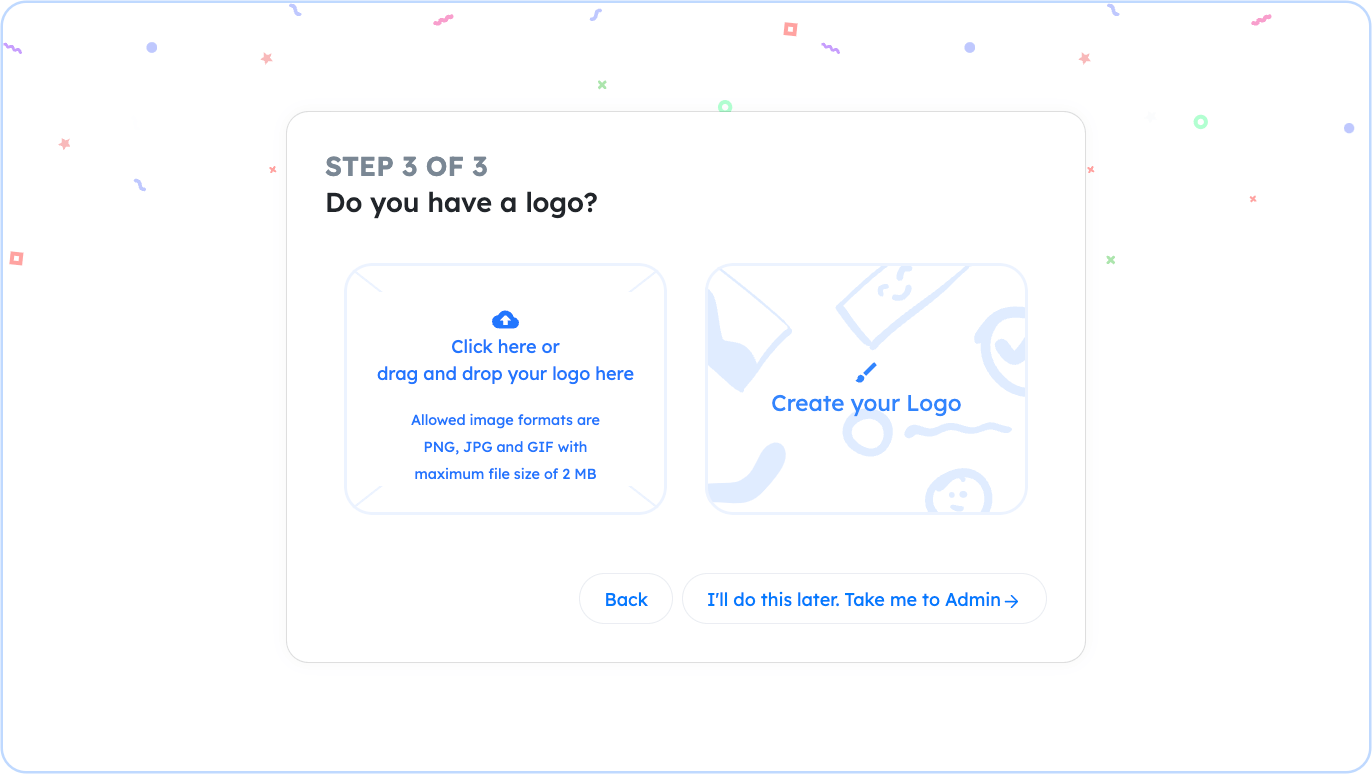
The next dialog is for your logo. If you have an existing logo, you can upload it in this step. If you don't have one, you can choose to create one using our Logo Creator. You can also choose to skip this step altogether and work on or upload your logo later. Depending on what you choose, click on Use Logo & Go to Admin if you chose to use a logo or I'll do this later. Take me to Admin if you chose to skip this step.
Once the initial setup for your account is done. You will be forwarded to the Admin Home page.